Blog

Terminal fun

Terminal commands
cmd-s = single user mode
fsck -yf = file system check forced, yes
exit = get out of single user mode
cmd-space terminal opens terminal

ctrl-x = stop
ctrl-z = halt (bad manners)

ping
ls list (what is next to me?)
pwd print working directory (where am I?)
cd change directory

ssh secure shell: login to another computer
example: ssh admin@10.14.252.43
10 means HPA
14 means energy lab
252 means leased address (DHCP)
43 is your address

say xxxxxx will make computers speak what you like (xxxx)

0 comments

Energy Hunt

energy hunt

  1. locate environmental sensor 10.14.28.1
  2. blow on the sensor, check the values
  3. try 10.14.28.1/state.xml
  4. track on elab2.hpa.edu, evaluate
  5. check out 10.14.90.101
  6. check out 10.14.41.1
  7. turn on the fans at 10.14.19.1
  8. control the fans with http://10.14.19.1/state.xml?relay1State=1
  9. go to http://elab2.hpa.edu login as elabconsole/papaya77
  10. control stuff

0 comments

locomotion

0 comments

Electrical Engineering fun

Today we learned about:
  • Ohms' law: V = iR
  • How to read a meter: continuity, Ohms, Vac, Vdc
  • How to find our fatal voltage
  • AC terminology: frequency and voltage
  • AC terms: L and N, hot and neutral, 120Vac and 220Vac systems
  • Transformers: how they work, primary and secondary, how NOT to hook them up
Next class:
  • How to solder wires
  • Basic 120Vac to your transformer
  • Waveforms on three scopes

0 comments

Sem exam part deux

Sensor hunt:
  1. locate env sensor 10.14.28.1
  2. evaluate environment
  3. track on elab2.hpa.edu, evaluate
  4. locate energy sensor 10.65.8.2
  5. evaluate values
  6. track on elab2, evaluate

Web pages:
  1. create a basic html5 web page
  2. load into your MAMP server
  3. start apache
  4. show your page at your address: 10.14.8.x
  5. paste a screenshot of this into your answer template
  6. paste the code from your page
  7. do the same with a cgi script of your choice
  8. show a screenshot of your cgi at your address
  9. show the code from the cgi

0 comments

Week of 11.10.14

Team,
I understand that some of you have been successful with your basic html pages, great work.
Please make sure you have completed the following modules:
1. Install and setup Raspberry Pi
2. Basic html uploaded to your /home/pi/www folder
3. HTML primer sections up to CSS, including the HTML5 examples
Where we will go next is into cgi scripts, written in PERL, a computer programming language. There is an excellent site on cgi 101 here:
http://www.cgi101.com/learn/
You can also find the complete text in our act resources folder, under pdf.
We will begin Monday by installing MAMP in your laptops. This is a neat kit installing four elements:
M=Macintosh, named after a noted breed of apple
A=apache2, which you are already deep into
M=mySQL a database system
P=PHP3, a gateway program used in online shopping, database access and other cool things.

You will install MAMP using the codes in the MAMP folder in our resource folder (look for codes.txt)
You will install MAMP using first the 3.0 code, which will require the 2.0 code as well.
If you are eager to try some of these out, you can download the free version from http://mamp.info, there is a mac and a windows version.
You could then try copying some of the cgi scripts from the text, there are some fun, interesting and creepy ones in there. None with cats, unfortunately.

To be better prepared, I ask that you read the first chapter in the cgi 101 text (online is fine, see link above). This should give you a great background on cgi: common gateway interfaces

We'll move after cgi into scratch, python and other programming, depending on your interest.
Please remember to list your idea for an independent project on your weblog.

Let me know how I can help.
aloha
b

0 comments

HTML primer pages

HTML skills list (skeelsz list):
  1. Create basic web page
    1. include html, body, head, title, p tags
    2. upload to server in www directory
    3. index.html vs. index2.html
  2. Text attributes
    1. bold, italic, underline, strikeout, emphasis, strong, small
    2. h1, h2, h3, paragraph, li
  3. Create links
    1. external link in the form <a href = "http://www.physics.hpa.edu">physics server</a>
    2. internal link in the form <a href = "/images/kittycats/">hideous creatures</a>
    3. internal directory links: <a href = "../images/kittycats/">hideous creatures</a>
  4. Image handling
    1. basic image format: <img src="falling_kitties" width="300" height="175" alt="poor kitty" />
    2. external images: <img src="http://www.omgmycat.com/images/falling_kitties" width="300" height="175" alt="poor kitty" />
  5. Advanced URL links
    1. http://www.tofukitty.com/
    2. ftp://www.tofukitty.com
    3. afp://physics.hpa.edu/
    4. mailto:kittydoctor@sadcats.com
  6. HTML5 goodies: basics and layout
    1. <!DOCTYPE html> declaration
    2. <html lang="language-code"> or <html lang=en-US">
    3. <meta charset="utf-8" />
    4. h1-h6
    5. <header>
    6. <header role="banner">
    7. <nav> <ul> and <ol>
    8. <main role="main">
    9. <article>
    10. <section>
    11. <aside role="complementary">
    12. <footer>
    13. <div>
    14. <div class="sidebar">
    15. comments: <!--blah--->
  7. HTML5: text operations
    1. <small>
    2. <strong> instead of <b>
    3. <em> instead of <i>
    4. <figure> and <figcaption>
    5. <cite>
    6. <blockquote>
    7. <time>
    8. <sub> and <sup>
    9. <code>
    10. <mark>
    11. line break <br>
  8. CSS basics

0 comments

Raspberry Pi goals checklist

Raspberry Pi task checklist:

  1. install pi from noobs
    1. connect HDMI, keyboard and mouse
    2. insert SD card
    3. connect power
    4. select Raspian install, click install
    5. once install is finished, in raspi-config, choose third line (startup options)
    6. select login to gui automatically
    7. tab to save, restart
    8. login with pi/raspberry
  2. configure IP address with /etc/network/interfaces
    1. open terminal app (LX terminal)
    2. cd to /etc/network
    3. ls to verify you are in the right place
    4. sudo nano interfaces
    5. change dhcp to static on the first interface (eth0), which is the ethernet
    6. insert the following lines below static:
      1. address 10.14.88.x (your teacher will give you your number)
      2. netmask 255.255.0.0
      3. gateway 10.14.0.1
    7. control-o to overwrite
    8. return
    9. control x to exit
    10. return
    11. sudo shutdown -r now
  3. ssh into from local mac
    1. from another machine, ping the address of your Rπ box
    2. note the response time
    3. ssh into the unit with: ssh pi@10.14.88.x
    4. use the normal password
    5. test your connection with who, last and man
    6. man ps
    7. note ps ax (no flags) and other options
  4. apt-get update
    1. from either your ssh connection (terminal) or the LX terminal, run sudo apt-get update
    2. sudo shutdown -r now
  5. install apache2
    1. sudo apt-get install apache2 -y
    2. after install, restart
    3. navigate to the apache configuration files in /etc/apache2/sites-enabled/
    4. sudo nano 000-default
    5. change the lines /var/www to /home/pi/www (both times)
    6. restart
  6. install netatalk
    1. sudo apt-get install netatalk
    2. after install, restart
  7. scp index.html from /var/www/
    1. ssh into the unit from your mac
    2. using the scp commands, copy the index.html page from the web directory of your Rπ box:
    3. scp pi@10.14.88.x:/var/www/index.html /Users/yourname/Desktop
    4. open the index.html page with textwrangler, note the html structure
    5. change a few words, then drag the changed file onto the safari icon to view your changes
  8. mkdir www in /home/pi/
    1. ssh into the unit and navigate to /home/pi:
    2. cd /home/pi
    3. mkdir www
    4. sudo ln -s /home/pi/web /var/www/ (this negates need to edit 000-default)

  9. chmod 777 www
    1. still in the /home/pi directory, change mod:
    2. chmod 777 www
    3. this will enable you to add pages to your apache web server
  10. scp new index.html into /home/pi/www
    1. copy your new index.html file into the /home/pi/www directory:
    2. scp /Users/admin/Desktop/index.html pi@10.14.88.x:/home/pi/www/
    3. test using your browser: http://10.14.88.x
  11. mount using afp://x.y.z.a
    1. on your mac, hit command-k and login to your Rπ box
    2. check to see if your index.html file is in the www folder
  12. copy jpg into www, change index.html into index2.html
    1. using the mounted directory on your mac, insert a jpg file
    2. change the name of index.html to index2.html
    3. view the site in a browser-what changed?
    4. open the index2.html file and the jpg file in a browser
  13. demonstrate directory listing
    1. add a few more items to your directory
    2. check to see if the directory is listed
  14. go on to html5 task list

0 comments

apache!

Team,
As you can see from the notes below (see previous entries) we have lots of fun ahead with the raspberry Pi units.
To prepare, along with the previously covered three links, we will begin html with this text:

http://www.htmlcssvqs.com

which is also located in the physics server under pdf:

http://physics.hpa.edu/physics/act/pdf/html_and_css_peachpit.pdf

The first link has html code examples you can copy for yourself, the text is perhaps easier to read if you download it (option click from the browser: "download file as")

Please read the first chapter of the pdf for class Monday, you'll find it very straight forward, and if you've done any html, mainly review.

I have some great tricks for us to try, this will help us move along together.
Let me know how I can help.
aloha
b

n.b. your brain can process 110 bits per second....

0 comments

Raspberry Pi installation notes-11.1.14

post install:
sudo apt-get update
ifconfig to get IP address
test ssh: ssh pi@x.y.z.a, pass raspberry

Network setup
cd /etc/network
sudo nano interfaces
change dhcp to static
add:
address 10.14.88.x
netmask 255.255.0.0
gateway 10.14.0.1

Make display stay on:
cd /etc/kbd
sudo nano config
BLANK_TIME=0
POWERDOWN_TIME=0

If restart needed:
sudo shutdown -r now

sudo apt-get update
sudo apt-get install apache2 -y
sudo apt-get install sqlite3
sudo apt-get install mc

Enabling PiFace board:

edit this file:

/etc/modprobe.d/raspi-blacklist.conf

change line to:
# blacklist spi-bcm2708

create file called installpf.txt in
/home/pi (this is your home directory)

sudo apt-get install -y python-dev python-gtk2-dev git
pushd ~/
git clone https://github.com/thomasmacpherson/piface.git
pushd piface/python
sudo python setup.py install
popd
sudo piface/scripts/spidev-setup
popd

the file is here:
Download file "installpf.txt"

Then type
sudo apt-get update
cd ~
bash installpf.txt

sudo shutdown -r now
then go to
python /usr/share/doc/python3-pifacedigitalio/examples/blink.py

Installing wi-fi:

sudo apt-get update
sudo apt-get install wicd-curses

then once installed,
sudo wicd-curses

P is for preferences
If wlan0 is at the top, then hit F10 to exit
R means scan

cd to /etc/network
edit interfaces:

auto wlan0
allow-hotplug wlan0
iface wlan0 inet static
address 192.168.1.51
netmask 255.255.255.0
gateway 192.168.1.1
wpa-passphrase WiFiPASSWORD
wpa-ssid WiFiNAME

comment out these lines:
#wpa-roam /etc/wpa_supplicant/wpa_supplicant.conf
#iface default inet dhcp

Copying files from rpi box:

scp pi@192.168.3.212:/var/www/index.html /Users/admin/Desktop


copy files TO raspberry pi:


scp /Users/admin/Desktop/installpf2.txt pi@192.168.3.212:/home/pi/


Install appletalk:

sudo apt-get netatalk

After netatalk is enabled, create a directory in /home/pi:

mkdir /home/pi/www

chmod 777 www

then go to

/etc/apache2/sites-enabled/

look for

000-default

sudo nano 000-default

replace

/var/www/

with

/home/pi/www/

do this twice.

Now, we can upload content to the server from afp

to enable directory listing, alter the name of index.html to index2.html

-------

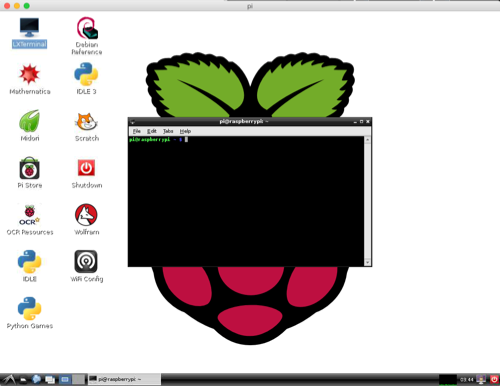
Optional: VNC installation

sudo apt-get install tightvncserver

run: tightvncserver

create control and view passwords (8)

start VNC server from terminal:

vncserver :0 -geometry 1024x768 -depth 24

Client: can be iTeleport or free installer at tightvnc.com

Download file "tvnjviewer-2.zip"

n.b. port may be 5900, 5901, 5902, scan to determine


-------

PiFace installation:

in text editor, create file install.txt:

sudo apt-get install -y python-dev python-gtk2-dev git
pushd ~/
git clone https://github.com/thomasmacpherson/piface.git
pushd piface/python
sudo python setup.py install
popd
sudo piface/scripts/spidev-setup
popd

sudo apt-get update

upload the file install.txt to your home directory /home/pi/

run bash install.txt

sudo shutdown -r now

test with this script:

python /usr/share/doc/python3-pifacedigitalio/examples/blink.py

python3 /usr/share/doc/python3-pifacedigitalio/examples/simplewebcontrol.py
Go to IP address:8000 for web interface

http://piface.github.io/pifacedigitalio/simplewebcontrol.html

http://piface.github.io/pifacedigitalio/example.html

PIFace Control and Display 2 installation (CAD)

To use the PiFace CAD you need to install the software that runs it.

Install the CAD software with the command
sudo apt-get install python3-pifacecad

This will ask you a couple of questions, to proceed enter Y

To use PiFace CAD, you should reboot your Pi
sudo reboot

Once you have installed the PiFace CAD software you can display our system info example using the buttons and LCD screen on your PiFace CAD

First move into the PiFace CAD examples directory
cd /usr/share/doc/python3-pifacecad/examples

Now run sysinfo using the following command
python3 sysinfo.py

Something like the following should appear on your PiFace CAD screen

The top line is displaying your local I.P. adrress. The left side of the bottom line is displaying the RaspberryPi's processor's temperature, and the right side displays the current memory usage. press Ctrl C to exit the program.

To install the media player that piface radio uses, enter the command:
sudo apt-get install mplayer
enter y when prompted.

Unzip the piface radio example, with the command:
sudo gunzip /usr/share/doc/python3-pifacecad/examples/radio.py.gz

Run the PiFace radio with:
python3 /usr/share/doc/python3-pifacecad/examples/radio.py


Fun links:

Supercomputer with Pi: (thanks to George Donev)

Next steps:
  • tightvncserver
  • PiFace sensors IP address:8000
  • PiFace CAD
  • Pwnpi 3.0
Next Options: cybersecurity or scratch/python/idle programming

0 comments

Raspberry Pi notes

To set your IP address

cd /etc/network
sudo nano interfaces
replace dhcp with static

address 10.14.88.x
netmask 255.255.0.0
gateway 10.14.0.1


Next:
sudo apt-get update
sudo apt-get install apache2

test with IP address
What is my IP address?
ifconfig

test with ssh and ping from external machine

0 comments

Raspberry Pi-overview

Team
Our next step will take you into the world of microcomputers. Here is the plan:

Part one: Raspberry Pi:
connections
basic startup with NOOBS
connection with HDMI (temporary)
connection with ssh
web page setup
wifi setup
advanced topics: pi Face interface I/O board

Part two: phidgets
basic I/O with sensors (light, temp, etc.)
advanced I/O with servos
webcams

Part three: arduino
basic setup
command line setup
network setup
programming examples

To prepare, for class Monday 10.29.14, please read these two articles:
http://www.raspberrypi.org
Then, this weblog entry following along in the same steps you will take:

I hope you have fun...
aloha
b


0 comments

Sensor hunt

Our elab has many sensors for air, energy and water. Seek out Erin and Jeff, who may help you with some clues to these mysteries:

Air sensors:
Have a look at each of these sensors, each one starts with 10.14.x.y:

47.1
31.1
30.1
29.1
20.1

Where are each of these located?
If you blow on each one, how does it change the numbers?
What is normal for each one?

Water Sensors:
Have a look at 49.1
Go flush one of the toilets.
How much water does this take?
How much should it take (look on the toilet)?

Energy sensors:
Have a look at these sensors:
14.1
41.1
42.1

Now make sure there is water in the hot water maker. Turn it on. What circuit is it on?

Next, login to elab2.hpa.edu, using elabconsole and our wifi password

Look under telemetry, then CBW air.
What can you see about the CO2 levels in each room?
Does your test show up?
Do the same with the energy panels, can you see the hot water maker?
Can you tell at what time the TVs were turned on in the main hall today?
What about yesterday?
Turn on both TVs in our classroom, can you see these on the monitor?

Finally, go to 10.9.250.8.
If 1 kW running for one hour costs us $0.45, how much does it cost to run the IT building for one hour?

0 comments

Wireless notes

Team,
Please review the first article for class, and skim the second one if you live in the dorms. We may use Ruckus as a solution there.
Download file "wifi notes.pdf"


Download file "wp-using-all-the-tools-you-can.pdf"

0 comments

Goals and achievements

Team,
Below is a list of goals and achievements for our networking unit. As soon as you complete each of these, you may move on to the next one. Each of these will be scored accordingly:

Cat 5 cable: 30 points
Create the cable: 10
Link works: 10
Speed at least 1000 mb/s: 10
Extra credit for over 1000 mb/s: 5

Airport base station setup: 75 points
Nuke/reset the base station: 10
Configure for named wireless access using only 5 gHz: 10
Restrict access to certain MAC address: 10
Inbound port map to web, ssh and afp wired: 30
Set to fixed WAN address: 10
Extra credit: timed access enabled: 5

Linksys WRT54GL router setup: 100 points
Reset the base station: 10
Configure for fixed WAN connection: 10
Configure for NON DHCP LAN connection: 10
Configure internal client port mapping: web, ssh, afp: 30
Configure wireless access with invisible network: 10
Restrict access to wireless network: 10
Demonstrate content control: 10
Extra credit: non-standard port mapping: 10

Advanced topics: DD-WRT, MicroTik routers (if interested)
DD-WRT setup: Extra credit: 40 points
MicroTik setup: Extra credit: 40 points

Wireless scanning: visible networks: 40 points
Demonstrate traditional Apple network search: 10
Demonstrate advanced Apple network search: 10
Demonstrate CLI network search: 10
Demonstrate wifi scanner utilities: 10

Wireless scanning: invisible networks/tunnels: 40 points
Demonstrate the use of Kismac to find invisible network: 20
Demonstrate the use of Kismac to find a tunnel: 20

Herobrine Hunt: variable points
Locate all wireless access points, including MAC address, vendor, AP/tunnel configuration, and channel/frequency: 10 points each AP


0 comments

week 6 notes: web servers, ports, routers

Review:
IP masquerading
routers vs. gateways
apache web server startup
dhcp vs. static addresses
ports: 80
html basics: index.html is the default page on web servers
(later: much more on servers, ports, html and net neutrality)

Ports: computer "doors"
portscan: what doors are available
Port 80: default web server port
test on your network with 127.0.0.1 and your 10.14.8.x address
try with the 80 and without

portscan:
use IPNM to test yours, and others
test physics.hpa.edu
test 10.14.4.32-who is this? how could you find out? try dns 10.14.1.1

router setup:
Airport extreme defaults to DHCP (dynamic host configuration protocol)
how is this different from static? why is it useful? where would I find it?
two sides to every gateway/router: the WAN side (wide area network=outside) and the LAN side (inside)
We will setup your routers to pass traffic from the HPA LAN (our WAN) to your private LAN (192.168.1.x). This means only YOUR computer, not the shared switch on your desktop. Why?
How will you know it is working?

See previous weblog for router setup notes, as well as the wiki here:


"DHCP wired" location, wireless disabled, can you browse the web?
Look at the settings the router gave you...
Your mind is probably constructing network diagrams, try writing these down. It's what I use to fall asleep at times...
Try now with a static address (static and DHCP can co-exist, but you can only have one DHCP server on the LAN)
Try either a 192.168.1.x address (your crossover network setting)
You will have to make sure the router is giving out addresses on the 192.168.1.x network.
NAT and Port forwarding (also known as inbound port mapping).

NAT: your computer uses the router to translate your address into a web request to the server, which then passes the response back to you, Network address translation (NAT)

Port forwarding/inbound port mapping: calls to the outside WAN side of the router are passed to some FIXED address on the LAN.
You have to have a fixed address on the LAN for the router to know who to send the packet to.

Test this on your private network with your apache web server.

Play around with this in the class, looking for others' routers, and your web server
You can also look under Utilities for Activity monitor, it should show folks looking at your web page
If you are really curious, you can go to console and see who exactly is looking at your web pages...
(look into the tail -f command for future reference)

Next steps: port forward 548, 22 and others...what do you see?
How could this be useful at your home/dorm?

b

0 comments

TCP/IP

Notes:
Review of cat5
why cat 5? what is cat6? cat4? cat 3?
Why is it also called twisted pair?
how many pairs? why a pair, and why twisted?
full duplex vs half duplex: which is which? examples?
wiring notes: 1/2, 3/6 why?

hubs vs. switches vs. managed switches
layer 2 managed gigabit switch
gateways: different media routers: same media
MAC address: 0a:1e:df:e1:58:16
first three pairs are the OUI
MAC stands for machine access control
IP masquerading: 254x254x254x254 still not enough addresses
hexadecimal: 2^4 = 16 so 0-9, a,b,c,d,e,f


crossover setup:
192.168.1.x
subnet mask: 255.255.255.0 what does this mean? why is HPA 255.255.0.0? why was it 255.0.0.0?
which is better? why?
router: 192.168.1.1 (does this exist?) what is a router/gateway? what is the difference?
DNS: what does this mean? can your computer work without it? how can you diagnose a dns issue?

TCP/IP as messages: TCP is the message, IP is the envelope
packets: header (destination), payload (message), footer (error correction) <more on this later with checksums>

Homework: read TCP/IP article on wikipedia, look up all terms
Homework next : cli share

Router setup:
cloud: all IPs (except for 10.x.y.z, 172.16.x.y, and 192.168.1.x) [this is called IP masquerading]
HPA: 10. x.y.z
elab: 10.14.x.y

Your internal network will be 192.168.1.x
routers vs. gateways

Airport extreme setup:
Make a new location called "dhcp wired"
make only ethernet active, with dhcp network numbers
connect to the reset airport base station on the LAN side (WAN side has a globe on it)
What is LAN and WAN again?
Configure your base station to do DHCP and NAT, with internal address starting with 192.168.1.x
Give your router a fixed address in the forma 10.14.251.x, with the list on the board
Your router external will be 10.14.251.x (numbers on board)
Your internal numbers will be 192.168.1.x (DHCP cannot be turned off on airport extreme routers-more on this next)
map out the path an incoming packet would take
packet dialog: ask (request), answer (response), check to see if you got it (TCP only, not UDP-why?)
can you browse the web?
what dns are you using?
can outside folks see your web page?
what web page?
I have a web page?
who the heck is "apache" and why is he in my computer?

nano /etc/apache2/users/USERNAME.conf

(USERNAME is your short login name)

then paste this part in:

<Directory "/Users/USERNAME/Sites/">
Options Indexes Multiviews
AllowOverride AuthConfig Limit
Order allow,deny
Allow from all
</Directory>

to start your web server, do this:

sudo apachectl start

what port is my web page on?

try this http://127.0.0.1

take a step back: setup your computer to share over the web: http, afp and ssh
find the ports for each of these (don't just check the little boxes)

Next: port scans-computer burglars...
also--hacker routers: dd-wrt


0 comments

Cat 5 cable code


0 comments

Resources

Intro to Advanced Computer Tech

Welcome to the Advanced Computer Tech course, here's a sum up of the topics you will come across


The fundamentals
-Terminal commands
-Binary
-TCP/IP

Computer language
html/Pico/CSS

HTML

Pico

http://physics.hpa.edu/users/stinson_kenji/weblog/16941/Notes.html


Advanced Commands

SSH/Traceroute

http://physics.hpa.edu/users/chen_ivan/weblog/93f01/Command_Reference.html

IP Net Monitor

http://physics.hpa.edu/users/balbo_luigi/weblog/37953/Computer_programming_notes_119.html

OSAScript

http://physics.hpa.edu/users/bleckel_bo/weblog/91c4b/12213.html


Using a remote computer

Directory Navigation

http://physics.hpa.edu/users/balbo_luigi/weblog/9de95/Computer_programming_notes_123.html


Wired and Wireless

CAT 5 - Patch cords

http://physics.hpa.edu/users/balbo_luigi/weblog/b4b03/Computer_programming_notes_213.html

Bullet and various antennas

http://physics.hpa.edu/users/balbo_luigi/weblog/002f3/Computer_programming_notes_220.html

Hunting the antenna

http://physics.hpa.edu/users/arakawa_kazu/weblog/f4ae5/UBNT_Scan_Results.html

Energy Systems - Sensor Hunt

http://physics.hpa.edu/users/stinson_kenji/weblog/8a9d9/Energy_Lab_Sensors_.html


During this course, it's absolutely advisable to take advantage of the unique benefits of using the weblog, as it's a limitless source of knowledge and bonus grades, with a constant and efficent use of this tool, you will find yourself on the top of the game , enjoy this incredible course and entertain yourself shutting down the computers of your friends.


0 comments

Week 3, class 2 (3.2)

Team,
Please make sure you have recorded your results from Unix war games today on your weblog.
Our next steps will be to pick up where we left off in the Taking control of our pdf:
Take Control of the Mac Command Line with Terminal (1.1):

Download file "Take Control of the Mac Command Line with Terminal (1.1).pdf"

Please read at least up until passwd command, and read ahead to cover these topics:
passwd,
scripts: #!/bin/sh
shell script: #!/bin/bash
alias
drag and drop terminal, open .
open -a safari, chess
permissions: chmod, ls -la, 421 rule 1-2-4 = rwx
4+2+1=7
chmod a+x
chown
su vs. sudo
defaults commands
sudo softwareupdate -i -a
try:

textutil -convert html file1.doc

with drag and drop from finder

grep, pipes
tar, tarballs
curl URL > filename.html
lookup scp (secure copy)
compare lsof -i and sudo lsof -i
--questions to consider:
• what is the difference between | and >

----network section-----
managing networks: curl showmyip, airport -s, lsof, ping, host, whois
nslookup
internal dns
sudo nano /etc/hosts/


As soon as we are comfortable with these commands, we can move on to networking, beginning with cat5 cables, which you will create on your own.
Let me know how I can help.
aloha
b

0 comments